Creating your own 3D characters for animation is no longer something limited to big studios or professional artists. You do not need perfect drawing skills or years of experience. What you need is a solid understanding of how animated characters are built and how each step fits together.
Many beginners feel excited but also confused. Where do you start? Which tools actually matter? And how do you avoid spending weeks on a character that cannot move properly? This guide is designed to answer those questions in a practical and beginner-friendly way.
By the end of this article, you will understand how to turn an idea into a 3D character that is ready for animation, how to design characters that move well, and how to build a workflow you can repeat and improve over time.
What Does It Mean to Create a 3D Character for Animation?
Creating a 3D character for animation means designing a digital character that is built to move, not just to look good in a still image. This is an important difference that many beginners miss at first.
A static 3D model can be simple or highly detailed, but an animated character must bend, twist, stretch, and hold poses without breaking or looking unnatural. This affects how the model is shaped, how joints are placed, and how much detail is added in certain areas.
An animation-ready character usually includes four key parts:
-
The model, which defines the character’s shape and proportions
-
The rig, which acts like an internal skeleton
-
The surface details, such as colors, textures, and materials
-
The motion, created through animation
When these elements work together, the character feels alive. When they do not, even a great design can fail once animation begins. Understanding this early helps beginners avoid common mistakes later in the process.
Start With a Strong Character Idea and Brief
Before opening any 3D software, the most valuable step is planning. Professionals often use a character brief to define who the character is and what role they play. Beginners can benefit from the same approach, even in a simplified form.
A character brief does not need to be long. It can be a short list of answers that guide your decisions. This brief becomes your reference point whenever you feel unsure about proportions, clothing, or style.
Helpful questions to include:
-
Is the character human, animal, or fantasy-based?
-
What is their approximate age and personality?
-
What kind of world do they belong to?
-
What is the character meant to do? Walk, fight, talk, or pose?
-
Is this character for animation practice, a game, or a short story?
A clear brief saves time. When you know your character’s purpose, you avoid adding unnecessary details that complicate modeling and animation.
Character Design Basics: Shapes, Color, and Expression
Strong character design relies on simple visual principles that communicate personality instantly. These principles apply whether you are sketching by hand, working in 3D, or using AI for inspiration.
Shape Language
Shapes suggest personality at a glance. Rounded shapes often feel friendly, soft, or playful. Square shapes suggest strength and stability. Sharp or triangular shapes can feel fast, clever, or dangerous. Most characters combine multiple shapes, but one usually dominates.
Color Choices
Color reinforces mood and role. Limiting your design to two or three main colors keeps it clear and professional. Bright colors can suggest energy or youth, while darker or muted tones may feel serious or mysterious.
Expression and Facial Features
Small changes in facial proportions can dramatically change how a character feels. Larger eyes may feel innocent or curious. Narrow eyes can feel focused or serious. Mouth shape and eyebrow placement strongly affect expression.
| Design Element | Common Impression |
|---|---|
| Rounded shapes | Friendly, approachable |
| Square shapes | Strong, reliable |
| Sharp angles | Fast, clever, aggressive |
| Warm colors | Energy, excitement |
| Cool colors | Calm, mystery |
Understanding these basics helps you design characters that communicate clearly before they ever move.
From Sketch to 3D: Turnarounds, Poses, and Movement
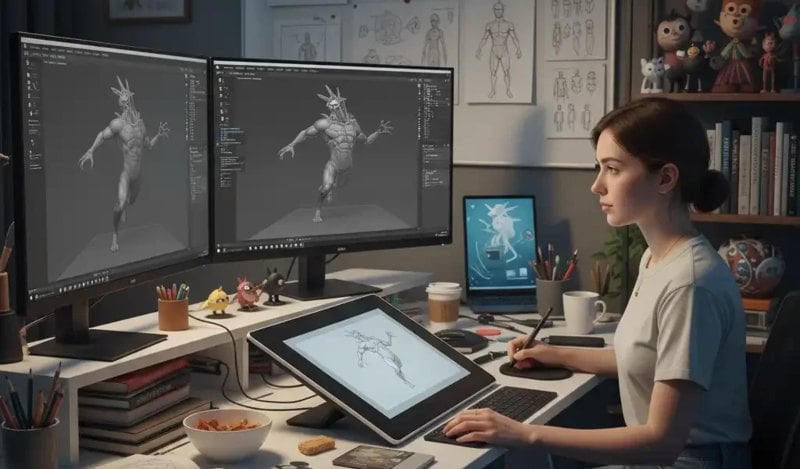
Before modeling in 3D, it helps to visualize the character from multiple angles. This is where turnarounds come in. A turnaround shows the character from the front, side, and back, helping maintain consistent proportions.
You do not need advanced drawing skills. Simple, clean sketches are enough. The purpose is to understand volume and proportion, not to create finished artwork.
Thinking about movement at this stage is also important. Sketching a few basic poses, such as standing, walking, or leaning, helps identify potential animation problems early. If a design looks stiff or unbalanced in a sketch, it will likely feel worse in animation.
Using 3D Character Design Software
Once your design is clear, it is time to build the character in 3D. Beginner-friendly character design software allows you to start from a base model instead of an empty scene, which reduces complexity.
With sliders and preset options, you can adjust body proportions, facial features, and overall shape quickly. This lets beginners focus on design decisions rather than technical modeling challenges.
Many modern tools also include automatic rigging features. These tools add a digital skeleton to your character with minimal setup, making it easier to test animation early.
| Creation Stage | How Character Software Helps |
|---|---|
| Design | Fast experimentation with proportions |
| Modeling | High-quality base models |
| Rigging | Automatic skeleton setup |
| Export | Easy transfer to animation tools |
This approach is especially useful for beginners who want to see results quickly while still learning the fundamentals.
AI and Easy Online Tools for Character Creation
AI tools can play a useful role in early character creation, especially for brainstorming and exploration. Image generation tools can quickly visualize character ideas based on text descriptions.
For beginners, AI is most helpful when:
-
Exploring different styles
-
Testing color palettes
-
Generating costume or accessory ideas
AI-generated images are usually not real 3D models. Instead, they act as visual references. You can use them to guide your design choices when building the actual character in 3D software.
Some online platforms also offer simplified character creation experiences that feel more like creative apps, making experimentation accessible and fun.
| Tool Type | Best Use |
|---|---|
| AI image tools | Concept exploration |
| 3D character software | Final model creation |
| Animation engines | Motion testing |
Beginner-Friendly Workflow: From Idea to Animated Character
A clear workflow helps beginners avoid getting stuck. Here is a practical process you can follow:
-
Write a short character brief
-
Gather reference images
-
Sketch basic front and side views
-
Build the character in 3D software
-
Apply automatic rigging
-
Test a simple animation, such as a walk or wave
This workflow encourages early testing and steady progress. The goal of your first character is not perfection, but understanding how each step connects.
Final Thoughts: Start Simple and Keep Creating
Creating 3D characters for animation is a journey that combines creativity and technical thinking. Every artist starts with imperfect results. What matters is consistency and willingness to learn.
By starting with a clear idea, using accessible tools, and focusing on movement early, you can steadily improve. Your first character does not need to be impressive. It only needs to exist and move.
Each character you create is a step forward.
 From Fan to Creator: Building Worlds in Roblox
- Get Robux for Free and Level Up Your Roblox Experience
- Discover safe and proven ways to get free Robux and grow your account
- Is Free Robux Really Possible? The Truth Every Roblox Player Needs to Know
- Why Custom Skins Matter in Construction Software
- Everything Else
From Fan to Creator: Building Worlds in RobloxIf you have ever searched for free Robux, you probably landed on suspicious websites, fake generators, or videos promising instant rewards. You are not alone. Almost every Roblox player reaches a moment where they want more Robux — for better outfits, cooler items, or faster progress. The good news is that understanding Roblox itself is the first step. Once you know how this universe works, everything else becomes easier, safer, and more fun. Before talking about earning Robux, let's explore the world where it lives. Because Roblox is not just a game. It is an entire digital universe built by players, powered by creativity, and connected by Robux.- Everything Else
Get Robux for Free and Level Up Your Roblox ExperienceAre you trying to level up your Roblox experience without spending real money? You are not alone. The internet is full of free Robux promises, shady generators, and fake hacks that put your account at risk. But here is the truth: there are real, safe, and proven ways to earn Robux without paying. In this guide, you will learn exactly how legitimate free Robux methods work, how to avoid scams, and how to start building your Robux balance the smart way. Stay with us — your Roblox journey is about to upgrade.- Everything Else
Discover safe and proven ways to get free Robux and grow your accountRoblox is free to play, but Robux is the fuel that powers everything fun inside the platform. The problem is simple: Robux costs real money, and many players — especially younger ones — want ways to earn it without paying. If you search online for "free Robux," you will find hundreds of videos, generators, and websites promising instant rewards. Most of them are scams. Some waste your time. Others try to steal accounts. A few legitimate methods do exist, but they require patience and understanding of how Roblox's economy works. This guide gives you a full, realistic, and safe roadmap. You will learn what is actually possible, what is not, how to spot scams, and how to build long-term Robux income streams inside the Roblox ecosystem.- Everything Else
Is Free Robux Really Possible? The Truth Every Roblox Player Needs to Know"Can I really get free Robux without paying?" "Is this free Robux site safe?" "Why did my friend lose their Roblox account after trying a generator?" If you play Roblox, chances are you have asked at least one of these questions. Robux is the lifeblood of the Roblox universe. It lets you dress your avatar, unlock premium zones, buy game passes, and stand out in social spaces. For many players, Robux is not just currency — it is status, identity, and freedom inside the game.- Everything Else
Why Custom Skins Matter in Construction SoftwareWhy do construction teams still rely on printed notes, phone calls, or memory even after adopting modern software? In many cases, the issue is not resistance to technology. It is that the software does not match how work actually happens on site. Custom skins in construction software address this gap. Instead of focusing on visual style alone, skins can reshape how information is prioritized, noticed, and acted on. This article explores how custom skins reduce errors, speed up field work, and improve coordination across construction teams.
- A Guide of Waifu Generators How They Work, Their Uses, and the Future You Need in 2025
- How Gesture-Based Access Systems Improve Safety, Efficiency, and User Experience
- A Beginner's Guide to Building a Career in 3D Character Animation
- How to Choose the Right Forklift Hire for Your Business
- Save Big on the 2025 Hyundai Palisade: Tips, Deals, and Buying Secrets
- How Artificial Intelligence Is Shaping the Future of Customer Engagement